
Go | New | Find | Notify | Tools | Reply |
Ammoholic |
Should I use mortar or the caulk style stuff to fix this? 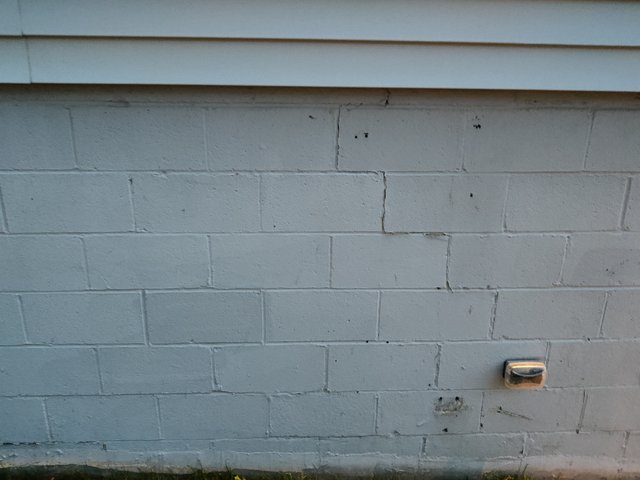 Jesse Sic Semper Tyrannis | ||
|
Fighting the good fight |
Do you want to do it the easy way, or do it the right way? The easy way to do it is to patch it with some masonry caulking. This doesn't do much for the structural integrity, and it can sometimes be hard to match the color, thus making the repaired area stand out cosmetically. The right way to do it, to both make it look better and repair its structural integrity, is to scrape/chisel/grind out the outer inch or so of the cracked mortar areas and reapply mortar to these joints. This is called tuck-pointing or repointing. And if you haven't already, you'll want to try to determine why it cracked. Some cracking from settling can be normal, but it can also be the hallmark of a bigger foundation issue. | |||
|
| Ammoholic |
Additional information, I'm painting, so matching won't matter as much as final looks after paint. Jesse Sic Semper Tyrannis | |||
|
| Gone but Together Again. Dad & Uncle  |
For some reason I can't zoom in on your pic. What I am looking for is to see if they are just hairline cracks or if the cinder blocks have pulled away from the mortar joint. As long as you don't have a structural issue, or if there is not water infiltration if your pic is inside your basement, you could get away with caulking. If structural or if water is a problem, grind out to a depth at least 1" and follow the crack lines joints as a guide. Mix up a batch of mortar, make the grind line wet, and press in the new mortar. Then you use a joining tool to make the mortar smooth to match the surrounding joints. Use a small sprayer and spray the finished joint a few times a day (the longer you keep the joint moist the "harder" the mortar becomes). Wait a few days and then paint. | |||
|
| Ammoholic |
Sorry for bad pics. The cracks are small, they look larger from the paint failing on top of the cracking. 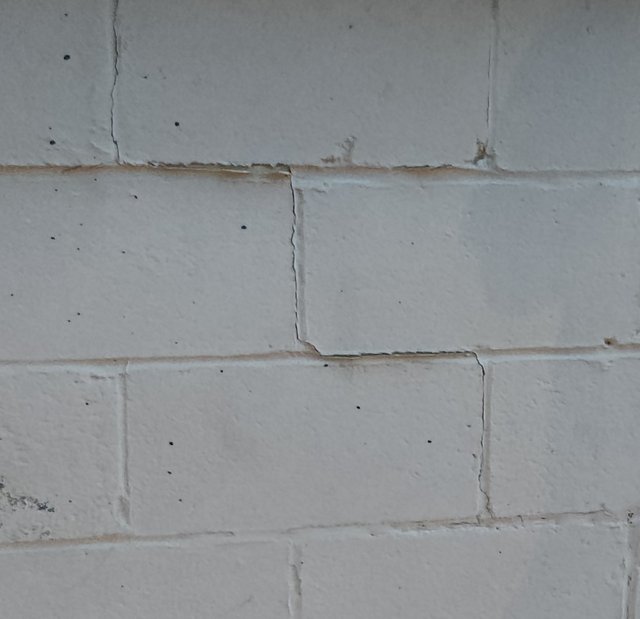 Jesse Sic Semper Tyrannis | |||
|
| Gone but Together Again. Dad & Uncle |
No problem...I bet if I was logged in using my phone I could have zoomed in but I am at work on my desktop computer. That type of cracking is considered normal and routine. I don't see signs for bad settling. Hence you could just scrap off the old paint around the crack, seal with caulk, and repaint. | |||
|
| Fighting the good fight |
If you're going the caulk route, ensure that the caulk you choose is paintable. | |||
|
| Ammoholic |
Bought the caulk, don't think it's going to work. Says 3/8" max gap. Some are almost half inch, if not over 1/2". Here's what I'm looking at cleaned out. 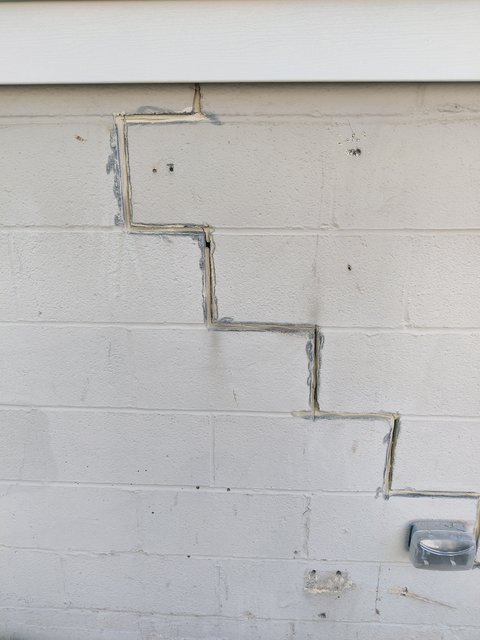  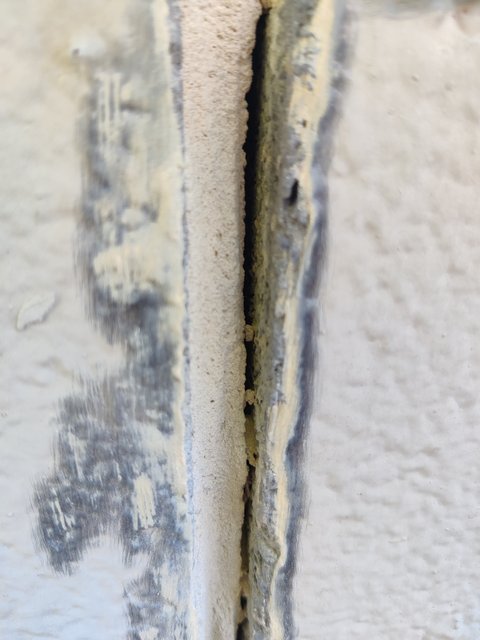 Jesse Sic Semper Tyrannis | |||
|
| Fighting the good fight |
Repointing is not difficult or all that challenging. It's just more effort than squeezing out some caulk. Lots of Youtube videos on how to do it. The most time-intensive part is chiseling out all the cracked mortar. It can go faster if you have access to an angle grinder with a diamond blade. | |||
|
| Master of one hand pistol shooting  |
Has one end of your structure settled? SIGnature NRA Benefactor CMP Pistol Distinguished | |||
|
| Blinded by the Sun  |
If there is occupied space on the opposite side of this wall, have it ground out and patched by a mason. The threat of mold is real. If this is a garage or non conditioned space use Sika Mortar fix. Go to there website and read the product data. ------------------------------ Smart is not something you are but something you get. Chi Chi, get the yayo | |||
|
| Ammoholic |
Wait, what? Have all of it ground out? I removed all the areas that had any cracks. There would be no benefit to removing mortar everywhere. Just want it to look decent after paint. Given the condition of block currently it will never be perfect. I just want it to look good for 5-10 years. I have looked at the Sika product you mentioned. For now I am going to buy that or similar so that the contractor can pressure wash to remove the bulk of failed paint/cracks without intrusion through the poor mortar joints. Then will reevaluate how to deal with the rest of the failing paint/cracks. I really want to if not for cost just parget it and cover the original crappy workmanship. Jesse Sic Semper Tyrannis | |||
|
| Gone but Together Again. Dad & Uncle |
Given your goals, just use the specialized caulk and paint thereafter | |||
|
Member |
Buy one bag Type S mortar and a bag of brown sand. Do not get yellow sand. Buy a round jointer. Hose out the joints you made. Mix 2 parts sand and one part Type S. Add water for a almost stiff consistency. The joints need to be damp then using a trowel pack in the mortar with the round jointer. Let all Men know thee, but no man know thee thoroughly: Men freely ford that see the shallows. Benjamin Franklin | |||
|
quarter MOA visionary |
Caulk like Big Stretch will work but I would use mortar. It will look much better, IMO. | |||
|
| Powered by Social Strata |
| Please Wait. Your request is being processed... |
© SIGforum 2026