SIGforum.com  Main Page
  SIG Pistols
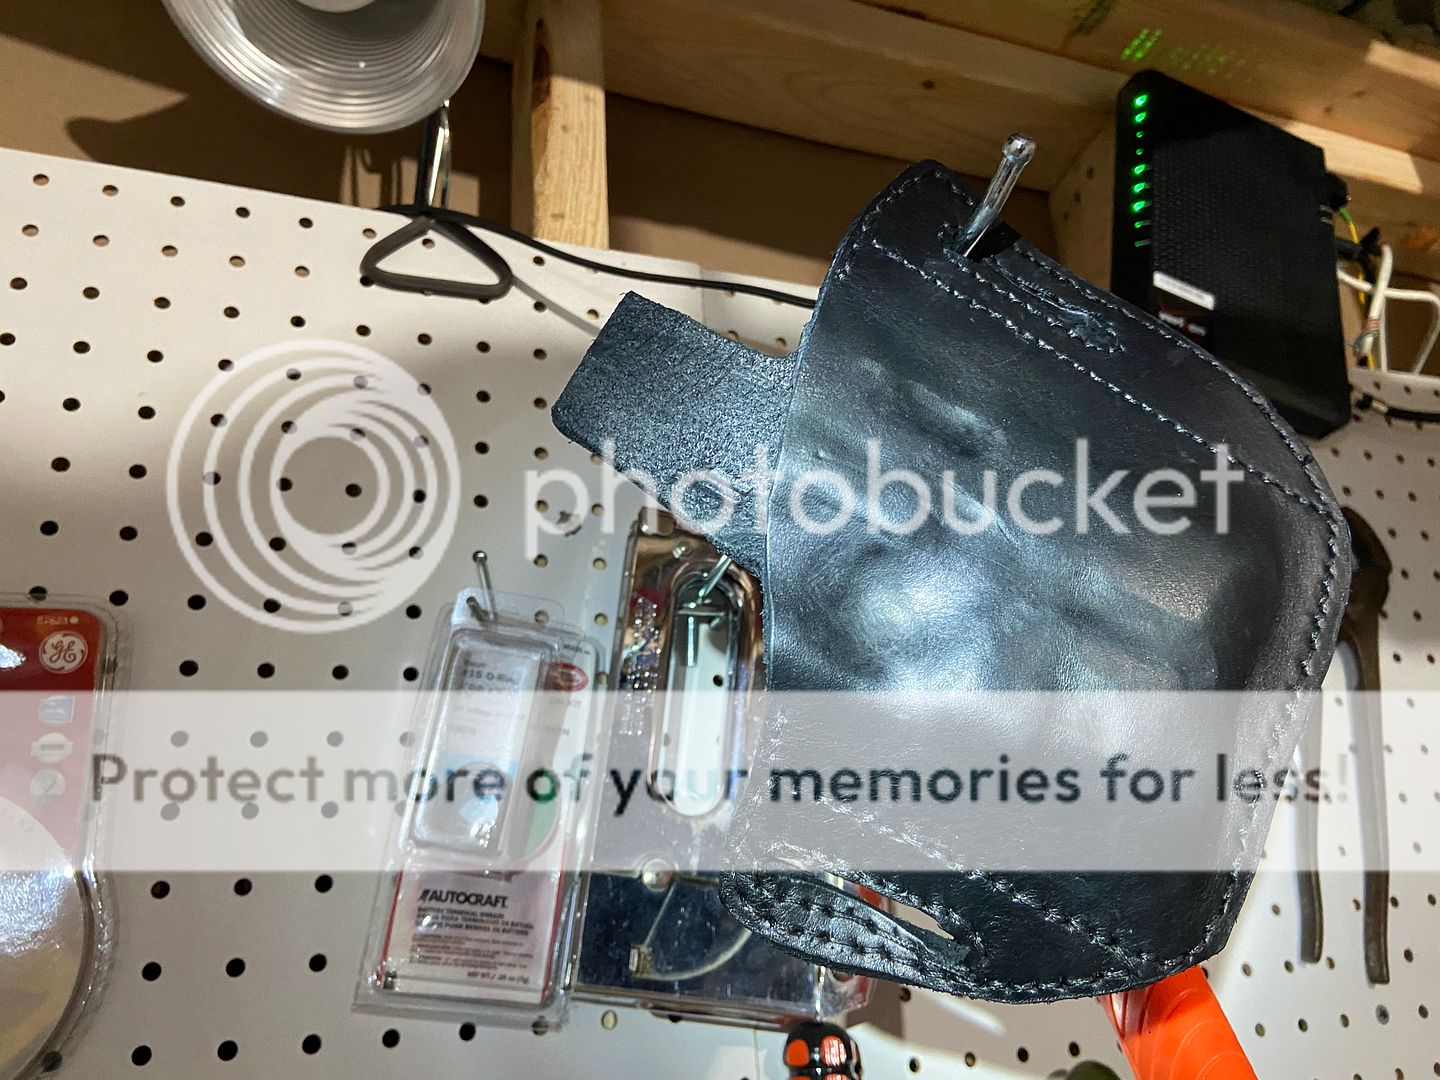
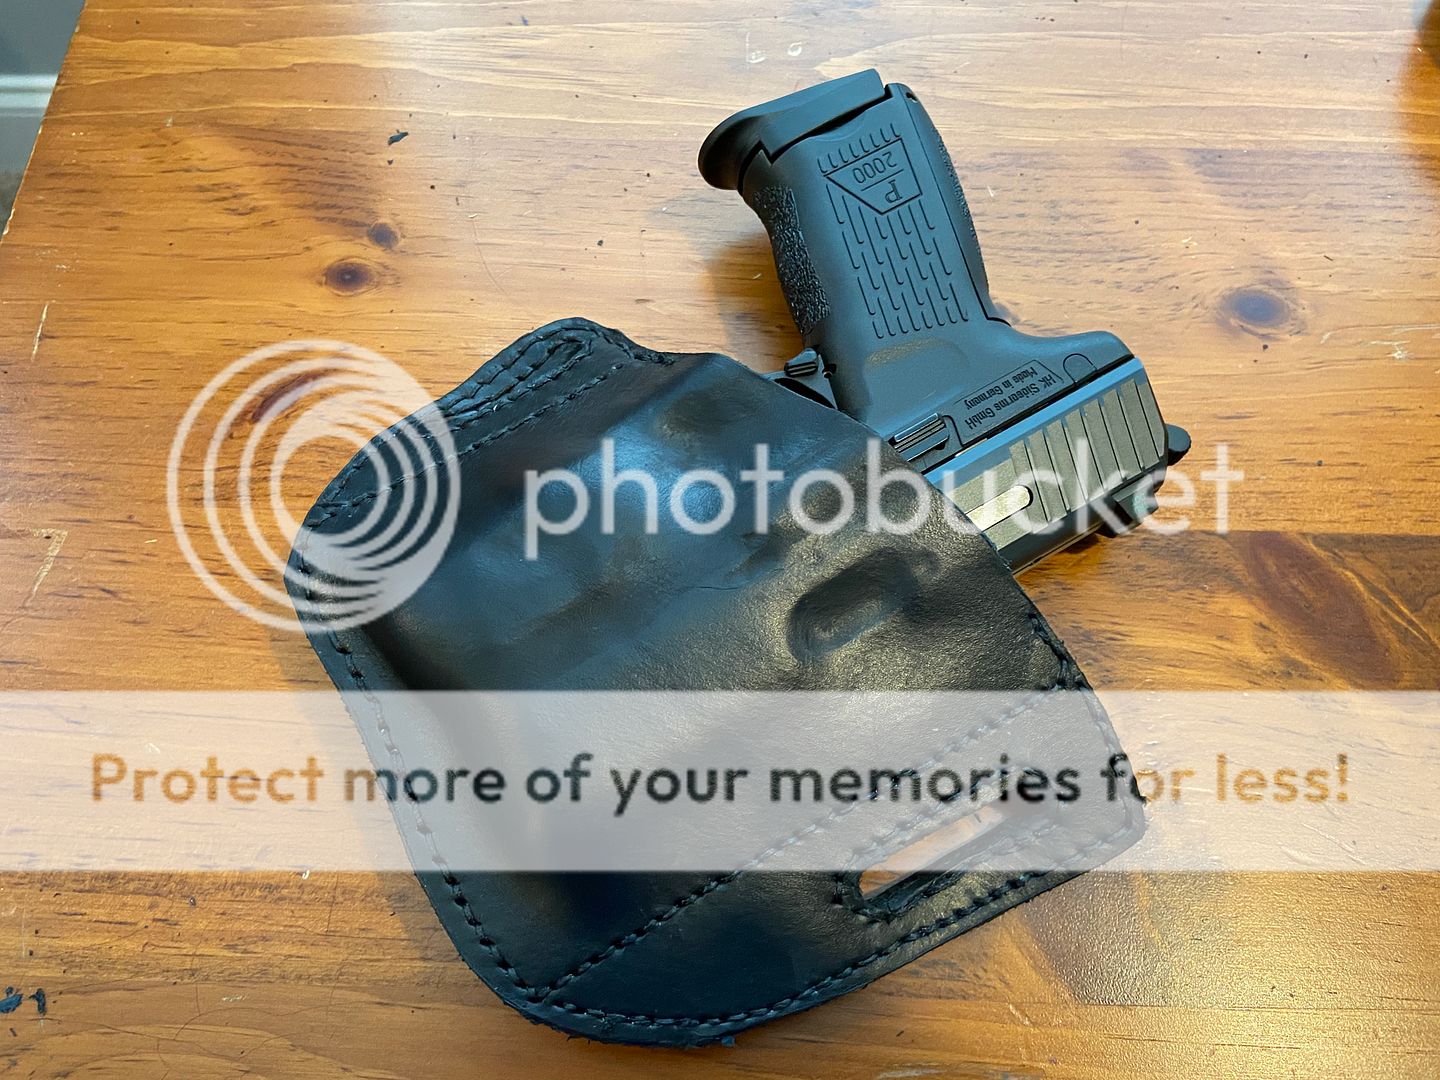
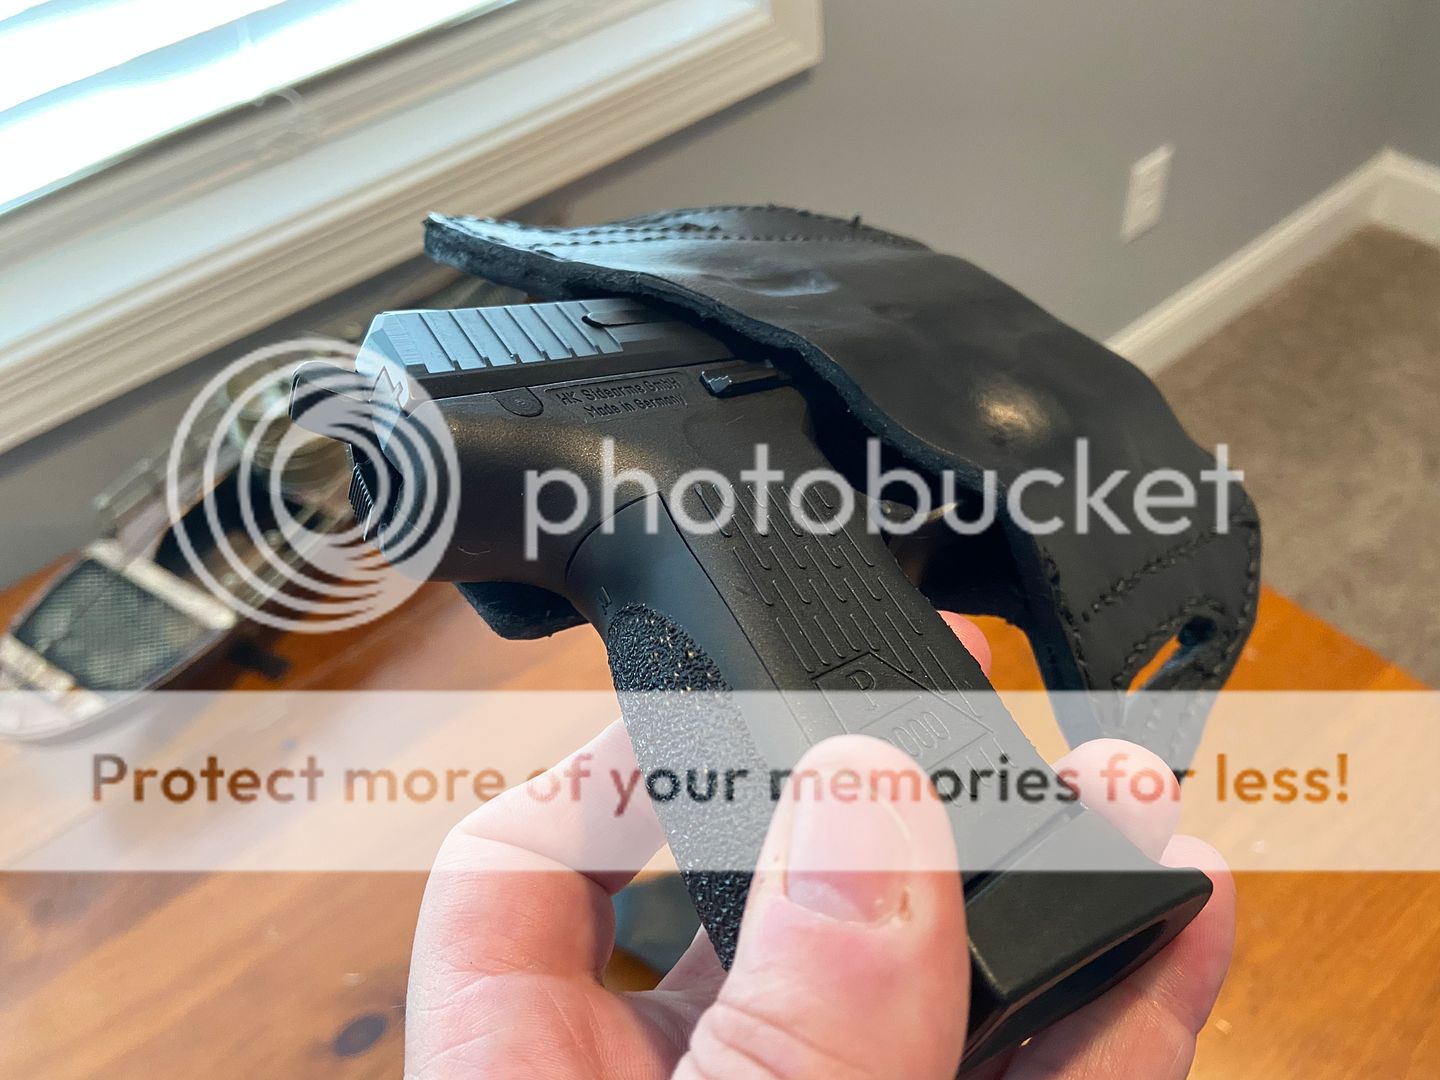
  So being stuck inside I tried my hand at making a holster.....my takeaway.....folks out there have SKILLS......I do not.
 Main Page
  SIG Pistols
  So being stuck inside I tried my hand at making a holster.....my takeaway.....folks out there have SKILLS......I do not.
Go  | New  | Find  | Notify  | Tools  | Reply  |  |
| E tan e epi tas |
So I have never so much as ever picked up a needle and thread but I have always wanted to try my hand at making a holster so I figured I would learn about some techniques by making a “holster” for an HK P2000 with TLR-7. What a learning experience. From figuring something approaching a pattern to everything else. I have never done ANY leather work. Hell I don’t think I did a key chain in scouts. I have never sewed anything in my life and wow I suck At that. At any rate it has been an enjoyable process and even though the final “product” may not be super viable, it has taught me some things and I will probably tinker around with this. My goal is to get a certain style down that I like so I can bust out holsters for my own stuff....but I see ALOT of practice and trial and error in my future. You guys who do this for real really have talent. I mean I knew you had talent before but I have a new appreciation for you guys who turn out functional art. Anyhoo here is my first poop thrown at the wall. I will see what sticks and go from there.  Take Care, Shoot Safe, Chris | ||
|
| Member |
I think your effort turned out pretty decent. And I have always thought that leather working is an art. Our SF leather smiths prove it. End of Earth: 2 Miles Upper Peninsula: 4 Miles | |||
|
| Age Quod Agis |
That's a good effort! I'm impressed! "I vowed to myself to fight against evil more completely and more wholeheartedly than I ever did before. . . . That’s the only way to pay back part of that vast debt, to live up to and try to fulfill that tremendous obligation." Alfred Hornik, Sunday, December 2, 1945 to his family, on his continuing duty to others for surviving WW II. | |||
|
| E tan e epi tas |
So it’s still drying but it turned out far better then I expected and is actually pretty viable. I mean the finishing, the stitching etc. sucks but for never having done this before at any level I am fairly happy and most of all it has taught me a lot of things for next time and it has been a lot of fun.   Take Care, Shoot Safe, Chris | |||
|
| Member |
How about a pic of the tools used to make it? | |||
|
| E tan e epi tas |
 . . Seriously though just a basic leather working kit from amazon or something. I did add a 1.5 inch loop cutter and used some pliers and a hammer at points.....because EVERY JOB needs a hammer. Take Care, Shoot Safe, Chris | |||
|
| Member |
Take a look at adamsleatherworks.com. Also. Search for Adam's leatherworks on you tube. He has several videos on holster making, and on his website he sells downloadable patterns for a number of pistols. TANDY sells leather and tools and books on leather working. | |||
|
| Member |
Damn, that's one helleva workshop! | |||
|
Member |
Turned out pretty nicely, IMO. Being closed off on the bottom, I imagine you're going to want to occasionally blow out any debris that collects in the bottom? The Enemy's gate is down. | |||
|
| E tan e epi tas |
Very cool thank you. I wanted to sort of tackle this with very rudimentary knowledge so if I start learning and doing more I have a baseline understanding of what I may learn from others as well as an understanding of pain points etc. I also wanted to sort of learn the tools on my own to an extent. I wanted to make my own pattern, well had to because of both the gun and the attached TLR-7, but also as a learning experience. I may well use one of those Adams patterns to do a P239 though. All in all the holster came out great “functionally” for me. It fits high and tight like I like and rides great. Although there is enough tension to hold the gun inverted I may put an adjustable tension screw in because I would prefer more. Ideally my end game is a high and tight pancake with a thumbreak as that is generally what I prefer. What this did show me was two primary things. 1-I can totally make my own holsters for anything I have for a fairly minor investment in materials. (Tools are largely a one time buy and like reloading factor in but quickly pay for themselves. I probably have $120 in specific tools MAYBE. Maybe less as I got most of them a year or so ago and just got around to this. ) 2-This one I always knew as I do have experience with Or know folks who do a great many things like body work or auto painting or tile work and I am fully aware of the time, materials and skill involved justifying the costs involved. That said you should never balk at paying $100-$200 for a quality hand made holster from one of the Many folks who do great work. There is a lot of time and skill involved and for them to make a buck those prices are very fair. At any rate this was really more of a craft/learning experience for me more then anything and I am actually happy and surprised I actually managed to create something viable for me vs. something unusable beyond the educational so I am calling it a win. Next time out I am doing a reinforcement panel and really going to work on edging. .....maybe I will make that Boy Scout key ring I never did so many years ago with the scraps. Take care, shoot safe, don’t run an awl through your hand Chris. Take Care, Shoot Safe, Chris | |||
|
| Member |
I like it! Got me thinking about giving it a try. ----------------------------------------- Roll Tide! Glock Certified Armorer NRA Certified Firearms Instructor | |||
|
| Member |
Personally, I think that's a pretty darn good first attempt on a holster. You did well... Wes | |||
|
Man of few words |
I think you did a very nice job cslinger. | |||
|
| Knife Farmer |
how funny, i did the exact same thing. been dabbling in leather and kydex holsters lately. dozer   "She's got a cherry-handled pistol in her lollipop pocket." Five Horse Johnson | |||
|
| Member |
Better than my first kydex attempt for sure. Practice makes perfect of course. Check out a few tutorials and give it another shot. I'd say just use a bit less space between the stitches and fit it when its wet. (are we not doing phrasing?) | |||
|
| Member |
Not a bad first holster. I started out just like you and have made a total of 22 of my own holsters from IWB TO OWB. Judging by what I can observe, your stitch work looks good and your dying as well.. This may help you a bit. I always start by creating a pattern on heavy drawing paper. I do this by tracing the firearm on the drawing paper, but then I go back over the tracing adding 5/16” to every dimension. That allows you just enough space for wet molding. That will also be where you will scribe the skin for your stitches to go. Don’t cut your hide there though allow extra space for the area you will be gluing. Once your pattern is drawn, cut it out and trace it onto your leather, then cut the leather. Make sure you get your front and back figured out before you trace it out. Good luck and enjoy it! If there is anything I can help you with don’t hesitate to email me. I emailed you a couple pics of what I have made | |||
|
| E tan e epi tas |
I am really glad you posted this because I just checked my email and was like WTF??? Then I figured it might have to do with this thread. Thanks all for the feedback and support, I will get around to doing another one. I don't remember exactly what I used as my stitch offset but I think it was close to 5/16th. The biggest issue I had was I was building this specifically for having the TLR7 attached so I lose that trigger guard area to very cleanly stitch both a stopping point and a cleaner retention area. Wet molding was harder with the light attached. Also I could probably user warmer water then I did. (I say that as I had no idea how to handle the light as I was moving through the project. My end game after I dork around a bit more is to come up with a similar design to what you see, with a thumb break, as this fits high and tight like I like but I have come to prefer thumb breaks after an experience where I was crawling/rolling around/moving through odd spaces etc. (NOT A FIGHT OR ANYTHING just some work on a play set that I ended up helping with with, but it quickly brought home the fact that in a fight or rougher terrain/movement etc. I liked the thought of that active retention. I never lost the gun but there were a couple instances where it grabbed on something and started to un-holster. Again that's just me/my desires not me saying what is RIGHT or WRONG. Once again thanks all. My next one will probably use one of the Adams Leather patterns for a SIG P239. (Simple, no lights etc.) Will be basic black but will probably stitch a reinforcing piece up front. Dozer, Love the reddish and black look. Take Care, Shoot Safe, Chris | |||
|
| Member |
Nothing wrong with that holster. Looks fine. People *might* be born with talent, but skills are learned. With time and experience, everything gets better. | |||
|
| Powered by Social Strata |
| Please Wait. Your request is being processed... |
|
SIGforum.com  Main Page
  SIG Pistols
  So being stuck inside I tried my hand at making a holster.....my takeaway.....folks out there have SKILLS......I do not.
 Main Page
  SIG Pistols
  So being stuck inside I tried my hand at making a holster.....my takeaway.....folks out there have SKILLS......I do not.
© SIGforum 2025