SIGforum.com  Main Page SIG Pistols Getting OCD with my 1911...or why I shouldn't be allowed to have tools.
SIG Pistols Page 1 2
Go | New | Find | Notify | Tools | Reply |
Prepared for the Worst, Providing the Best |
I’m a tinker at heart. I can’t just leave stuff alone. I like to understand how things work, and how to troubleshoot and repair them. Sometimes this gets me in trouble. I kinda need some guidance here, if anyone is so inclined (and can bear with me through the backstory). I have a perfectly good Springfield Loaded Stainless 1911. It’s accurate and reliable, even with the factory MIM parts. In fact, I don’t think it has ever had a stoppage in the probably 2500 rounds I’ve put through it. From the factory it had a pretty good trigger (with just a tiny amount of perceptible creep between takeup and the break), and a well-fitted ambidextrous safety that had very positive engagement. The only complaint I had was that the slide stop couldn’t be re-inserted without first manually depressing the plunger. I fixed this by filing and polishing a notch in the back of the MIM slide stop lever where it interfaces with the plunger, and resolved that problem. It also shot high from the factory, but a quick call to SA customer service resulted in them shipping me a new rear sight for free that brought POI right to POA. I also swapped the full-length guide rod out for a GI style, just because I prefer it. Other than that, I was content to leave it stock for a year or so. Then the stupid ambidextrous safety started bugging me. I ordered an EGW forged single-sided safety from Brownells, watched some youtube videos, and went to work with a file. I got it fit just right, and then blended and polished it and was very happy with the result. It has a nice wide lever to rest my thumb on for a thumb-high grip, is even more positive than the factory part, not MIM, and doesn’t have a superfluous lever hanging off the right side to cause problems. I should have known that once I started, things would get out of hand. I didn’t love the holes in the factory trigger, as they collect range gunk and were a pain to clean. I found what I thought I wanted on Harrison Custom’s website (and bonus, they make them for the EMP, too, so I ordered one of those as well), but then got to thinking about all those MIM parts, which lead to the purchase of a full ignition kit with a true-radiused sear, new sear spring, new hammer strut, and an EGW slide stop lever and oversized firing pin stop while I was at it. I spent the better part of yesterday afternoon putting it all together, and finally got it done. The ignition kit is top notch. There is zero creep and a clean break at probably around 4-5lbs (guessing, don’t have a scale). I didn’t touch the engagement surfaces at all...just a little light polishing on the sides of the hammer. The hammer strut pin was a bear to get in...that thing is TIGHT! But at least I know it won’t work itself out. The forged EGW HD slide stop is awesome...a perfect fit with zero slop, and comes from EGW with the plunger notch already cut so I didn’t have to do that again. My thumb safety needed additional fitting to work with the new sear, but this was ok as it meant I didn’t have to buy and blend a new one. The two things I’m not sure about are the trigger and the oversized firing pin stop. I fitted the trigger shoe top and bottom until it falls freely through the slot. I deburred the frame as much as I could, but I’m still getting some light scratches on the sides of the trigger shoe, and there’s some lateral play (vertical fit is perfect), almost like the trigger is too narrow for the slot, yet I’m still getting drag marks. I sanded the slot in the frame for the bow with 600 and 1500 grit, and polished the bow itself to a mirror shine (including the top and bottom surfaces). It engages the sear perfectly, and functions fine, but it just feels a little off somehow...it’s hard to describe. I think I actually miss the serrations of the factory trigger. I’m trying to decide if I should mess with this one some more, put the factory one back in, or go with something else. The firing pin stop is another conundrum. I read some stuff about how the oversized stops with the minimal radius on the hammer cocking surface increase unlock time and make the gun shoot smoother. Supposedly this was also the way JMB originally designed the gun. I shot it today, and really didn’t feel any difference in recoil...but it sure is harder to rack with that thing in there! Maybe I need to take both parts to the range and shoot them side by side, but I’m kinda tempted to put the old part back in at this point...or at least replace it with a forged, radiused part. As it sits currently, it seems like all detriment and no benefit. The slide is so stiff to rack right now that it inspired me to do some light filing of the edges of the slide serrations with a round file, just to knock them down a bit. They were tearing up my fingers, and the front ones have always had a bad habit of shredding leather holsters, so maybe this will help with that. Unfortunately, I managed to get into the bead blasting in the valleys a bit while I was doing this, and scuffed that up, so now I need to figure out what I’m going to do about that. It’s just cosmetic, but it bugs me. On the upside, the gun passes all the function checks, and I took it out today and put about 100 rounds through it with nary a problem, so at least I didn’t mess anything up mechanically. Accuracy didn’t suffer, either....target was shot standing at 20 yards, resting my arm against an upright to take some of the shake out. If anyone has any input on the trigger or firing pin stop, I’m all ears...or for that matter any other 1911 wisdom that you can throw my way while you’re at it! I also realized it still has an MIM mag catch, mainspring housing, and grip safety...so those are potential future projects I could also use advice on. Ultimately, I’d love to build a 1911 from parts, so this project is kind of a precursor to that.  ----------------------------------------------------------- Any comments made by this poster are my own and do not reflect the views or opinions of my employer. | ||
|
Frangas non Flectes |
I'm not seeing the problem here. With every step, it's becoming more your gun. As I type this, behind me on a stand sits a Gibson Les Paul. The ONLY original parts left on it are the frets and inlays. It's perfect. ______________________________________________ "If the truth shall kill them, let them die.” Endeavoring to master the subtle art of the grapefruit spoon. | |||
|
| Each post crafted from rich Corinthian leather  |
@92fstech, I say kudos to you for having the wherewithal to take-on such DIY work on the gun as you have. I’m a self-proclaimed “1911 Guy” but currently don’t have the gusto to dig into the innards of the gun like you describe. I have pondered using my SA Mil-Spec as a testing-ground, so to speak, for taking the gun down beyond the standard field-strip. Other than removing the extractor and firing pin / spring each cleaning, my next most “ambitious” effort was swapping-out a magwell a couple of times haha. "The sea was angry that day, my friends - like an old man trying to send back soup in a deli." - George Costanza | |||
|
| Member |
I wouldn't get too excited about the trigger fit in the frame until you shoot it like that, and I'd oil the trigger channel lightly. The friction on the trigger sides should disappear. The chief purpose of an oversize firing pin stop is to prevent rotation of the extractor by more firmly filling the firing pin stop slot. They tend to loosen over time, especially the milspec and factory parts. So far as the lower edge of the firing pin stop, radius to taste. Leave it more square, contact the hammer sooner on slide cycle, and the hammer is contacted lower on the hammer; less leverage on the hammer slightly higher resistance. The reverse is true to radius the lower edge of the firing pin stop. Leaving it more square was somewhat of a fad about thirty years ago. I radius it with a jewlers file, in place, until I'm satisfied. | |||
|
| Prepared for the Worst, Providing the Best |
So there's nonspecific angle on the firing pin stop that I'm shooting for? Just going by "feel" basically? Any tips for cutting the radius into that tiny part and still keeping it square? Am I understanding correctly that you are filing it while it's installed in the slide? ----------------------------------------------------------- Any comments made by this poster are my own and do not reflect the views or opinions of my employer. | |||
|
| Member |
I file on the slide, with the slide stop in place. Use a file with no teeth on the edge, so only the file face cuts; it avoids cutting into the areas adjacent to the slide stop. Because such a wide variety of recoil springs (and hammer springs) are available for the 1911, and because you could be shooting a wide variety of loaded ammunition, how you radius the firing pin stop might be tailored to how you plan to run the pistol. The more square that bottom edge, the lower the slide velocity, as the extra material (corner) increases the slide resistance. I'm no expert on that, but to me I'd be most concerned about reliability and function, first. The original firing pin stop used a .78 radius (5/64). It was reduced to 7/32 later because of complaints of difficulty hand cycling. Today, many of the firing pin stops have a more radical radius, or no lower edge at all. The radius slows the cycling, and some suggest enhances extraction and feeding. It also allows use of a lighter recoil spring. I'd start with breaking the edge lightly and work out from there, experimentally if you like. You can use dye to verify the contact surface and to make it more precise and even, but I've just eyeballed it and it seemed to do well, then final work can be done with abrasive cloth. If you do fit the stop in place, it should be removed for final cleanup, as there will always be a little material on the edge that the file doesn't get. | |||
|
| My other Sig is a Steyr.  |
Seems familiar somehow. Did I really need a Glock in .38 Super? Nah! I needed to make two of them... | |||
|
| Member |
I am very much the opposite of you. Does it work? If yes don’t do a dog gone thing. For many years with 1911’s and now with glocks, people mess with them until they become unreliable don’t fall into that trap. If you have an accurate reliable gun my personal advice is leave it alone | |||
|
Nullus Anxietas |
This ^^^^^ for me, too. When I eventually get the Man Cave Project completed I may try my hand at simpler gunsmithing. Until then I leave necessary work to one of my local, competent smiths. E.g.: My 10mm Kimber Classic II GFO. It has a very slight, somewhat intermittent "hitch" in the trigger. When I say "very slight" I mean as in "You'd never notice it shooting at speed in competition or in SD." But I notice it when slow-firing for accuracy and I know it's there. Plus the extractor tension being too great has led to FTFs. I could throw more 10mm ammo down-range in testing my extractor tuning to know when I've finally got it right, or I could take the thing to my local 1911 smith and tell him to get rid of the hitch, get the extractor right, and do anything else in there you find necessary for a woods-carry SD pistol. "America is at that awkward stage. It's too late to work within the system,,,, but too early to shoot the bastards." -- Claire Wolfe "If we let things terrify us, life will not be worth living." -- Seneca the Younger, Roman Stoic philosopher | |||
|
| Prepared for the Worst, Providing the Best |
Sns3guppy, thanks for the input..that was a great description and very helpful. I need to find a jewelers file with safe sides and give that a try. There's really nothing to lose on that part at this point. In my mind, I know it makes sense to just leave a working gun alone...but like I said, I have this compulsive urge to tinker, and there's always that desire to make something just a little bit better. Add to that that there is no local smith, so any work has to be done by me. I will say I know my limitations. I don't touch sear surfaces (although I'd like to learn how), or make any modifications to the frame besides light hand polishing, so everything I've done to this gun beyond cosmetics can be easily reversed by swapping the original parts back in. I also enjoy the learning process and the mechanics of it all. I'd actually really love to go to gunsmithing school, but I don't think that's in the cards at this point in my life. I have been fortunate to get to do some armorer classes, and enjoyed them, but that's just swapping parts, not fitting or machining. ----------------------------------------------------------- Any comments made by this poster are my own and do not reflect the views or opinions of my employer. | |||
|
Member |
Great post! It’s this kind of thing that got me into gunsmithing in the first place. However, it was the desire to make a more substantial living that relegated it to a hobby rather than a profession. Sounds to me like you are just skipping my first step… ***** Today, my jurisdiction ends here… | |||
|
Glorious SPAM! |
 Nice looking Loaded. Small font roll marks, which I like. I made a few changes to my Defender. Best 1911 bang for the buck there is. | |||
|
| Glorious SPAM! |
From what I have read you just need to 'break" the angle. I held it in my hand and curved the file over it until I got it where I wanted it. I used to buy EGW flat bottomed stops and fit them to my pistols but frankly while I did notice a slight difference IMO it isn't always worth the effort. Harrison sells nicely machined ones now with the angle already set. You might just have to fit the sides to the extractor. I have used a couple of these and they are excellent. Harrison FPS These are VERY hard, make sure you have a good file to fit them. The only pistol where I really saw a difference was on my 1947 Government Model. It had been "tricked out" in the 50's. Light trigger, Kings barrel and bushing. It seemed to open WAY to fast. I kept getting powder on me when it ejected a cartridge. I put in a new standard 16 lb recoil spring and 23 lb mainspring and that helped, but the "powder blast" really went away when I fitted an EGW flat bottomed firing pin stop. Great shooter. | |||
|
| Prepared for the Worst, Providing the Best |
That's cool...I'd definitely be interested to hear your story behind that if you'd care to share. I have a newfound lifelong need for health insurance, so self-employment isn't in the cards...nor do I have the skills to be successful at this point, but I enjoy the learning process, and I could see doing it as a hobby or maybe even a side gig someday if I ever get good enough at it.
Interesting that you should say that. I took that gun to FL last week, before I did the mods. We shot at a public range down there standing behind a bench. I usually don't do that as most of the bags at my range here at home doesn't have benches. I noticed a good amount of unburned powder...figured it was something to do with the load I was using. I'll have to shoot it off a bench again before I try radiusing this firing pin stop and see if it has reduced that at all. ----------------------------------------------------------- Any comments made by this poster are my own and do not reflect the views or opinions of my employer. | |||
|
| Glorious SPAM! |
So I was digging through my parts stash and I found an unmolested stainless Harrison FPS for a series 70. Should fit your Springfield. The bottom radius is set so you’ll just have to fit the sides to your slide and extractor. Like I said these are hard, you will need a good file. Go slow, take some off from each side evenly, and test fit after every few file strokes. When you test fit make sure it is actually still too wide and there isn’t a burr making it hang up (a little emery paper after a few file strokes helps). “Brother, I’ve been there” lol. A micrometer will help you measure your slide and the FPS. Email is in my profile, drop me an address and I’ll send it out Monday. 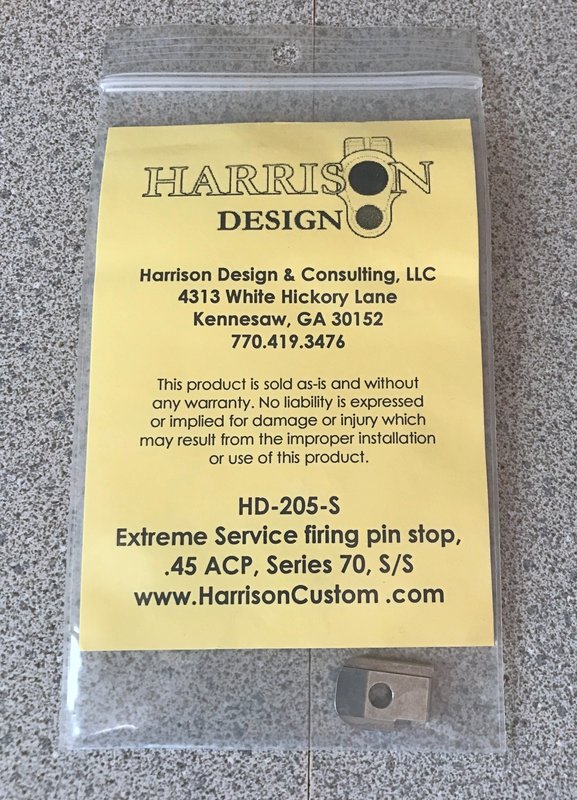 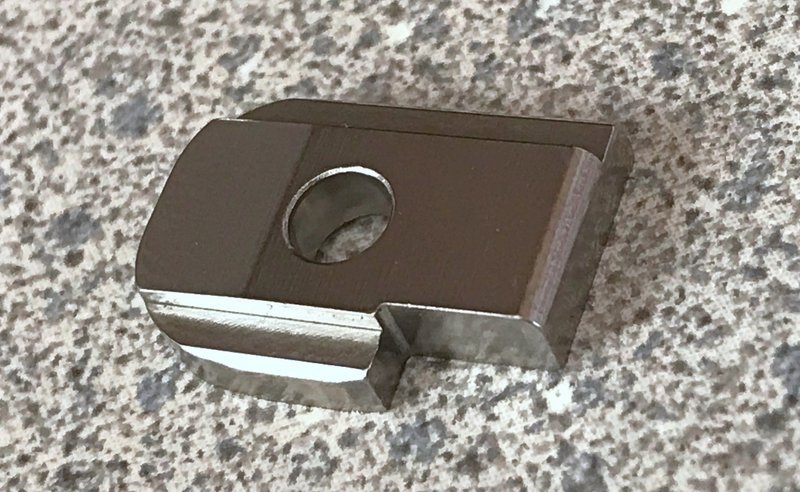 I originally bought it for a stainless Colt Series 70 Repro I had bought but it shot so dam well I didn’t bother. I sent the Colt to Harrison and had him fit a retro rear sight and dovetail a front sight. Then one day my buddy was looking for a gift for his dad for Christmas. His dad had always wanted an honest to God Colt 45 but never bought one for himself. So I sold it to my buddy and his dad was happy as hell with his Christmas gift. Still carries it when he is out hunting. Gratuitous Colt Pics  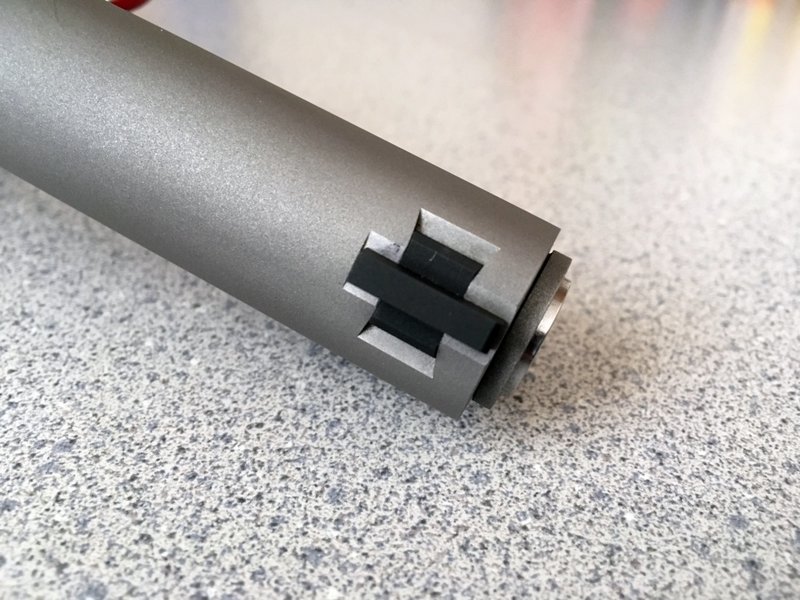 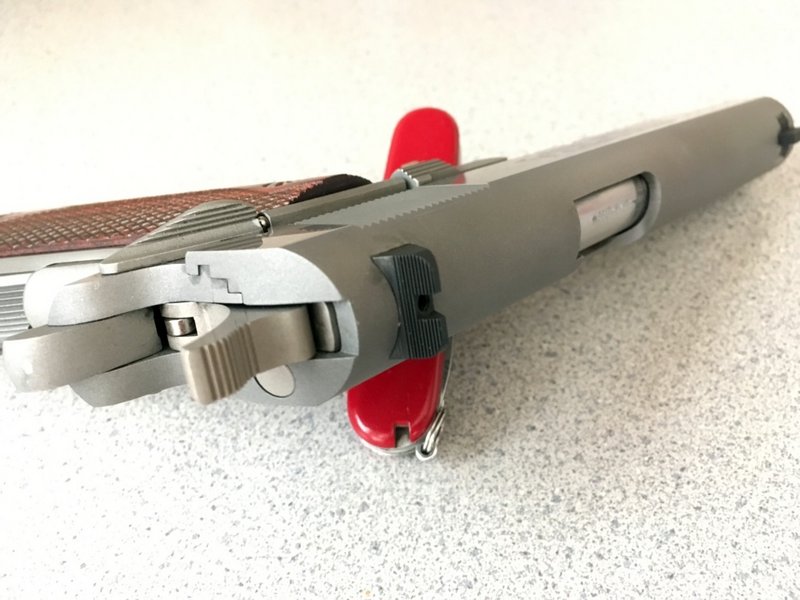  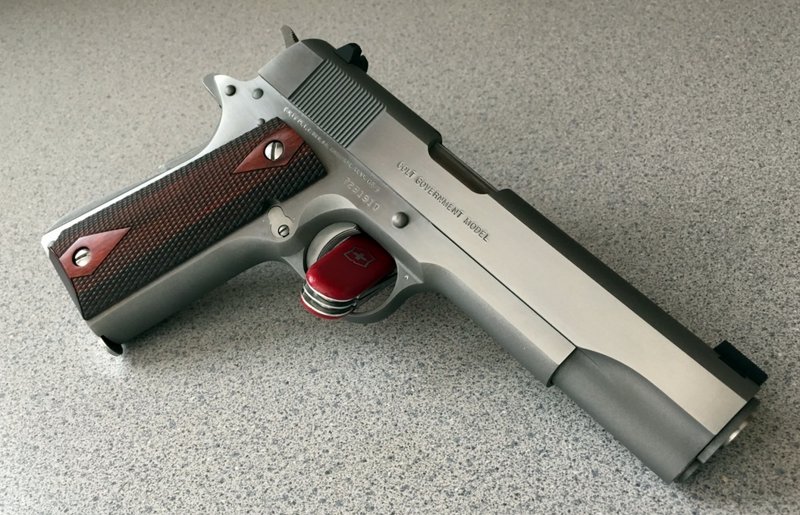 | |||
|
| 7.62mm Crusader |
Safer to use India and hard Arkansas stones. Add these to your tool box for guns. Warning: all the cool and useful shapes and grits are addictive.. | |||
|
Member |
Love it! The more you play the more you learn. Best advice I ever got was always file on the cheaper part! I went through the same process. Little parts ... big parts ... entire gun. It is fun and fulfilling. FP stops are cheap ... trial and error as long as safety protocols are met is OK. Don't listen to nay sayers ... they are no fun. Not all guns are meant to be our sole device for personal protection. If you are that concerned with function, carry a revolver! I do a lot, BTW. MPrimo Sigs, Glocks, 1911s, M&Ps ... well, you get the point! | |||
|
| Member |
Yup. I love to tinker. Knowing how your guns work and fit together is a good thing. As long as you follow the file on the cheap part routine nothing you do can’t be undone. I’ve always wanted to “fix” my EMP4. Smooth out the trigger and get rid of that horrible ambi safety. Maybe I shall. I learned something today. The whole thread I was not really catching what exact part is firing pin stop. I’ve played with those in multiple guns but never really knew it was called that until the picture was posted and then it all made sense. Lol | |||
|
| Prepared for the Worst, Providing the Best |
mbinky that's a beautiful Colt! I really, really like that. I appreciate the offer of the FP stop. The EGW part that I got looks to have a very similar radius at the base to that one. The factory part has much more slope...it's almost like a ramp. I don't have it in front of me right now, but it's kinda like this one: 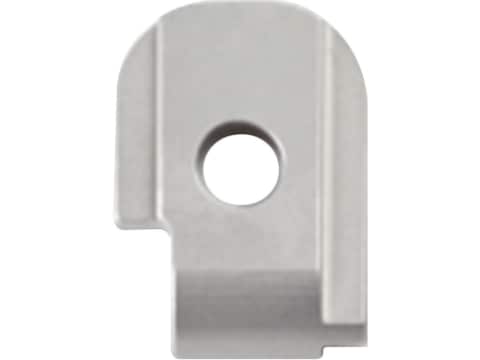 I already fit the sides of the EGW stop to the slide, so I'm good there. Now that you brought up the fact that the sharper radius might improve powder burn due to a longer unlock time, I kind of want to test that theory out before I change anything. Right now the only "issue" is that the slide is more difficult to rack than it was with the factory part...but I can live with that if it improves powder burn. I don't want to take your part if I don't need it...you never know, it might come in handy for you or somebody else that really needs it at some point! Give me a couple of days to get back to the range and I'll let you know.
I replaced the safety and the slide catch lever on my EMP4 a month or so ago with EGW HD parts. I've been very happy with the results, although I still want to blend the contours of the safety lever a bit. I have a new sear spring and the Harrison solid trigger to put in there, too, so I'll probably do them all at the same time.  ----------------------------------------------------------- Any comments made by this poster are my own and do not reflect the views or opinions of my employer. | |||
|
| Glorious SPAM! |
This is exactly why the ordnance corps asked JMB to change it. Too hard to rack. It had nothing to do with the pistol's operation. The current FPS is very sloped as you noted. The original, as JMB designed it, had a very hard radius. I'll keep looking for the citation but right now my google foo is off lol. And yes with that particular pistol the EGW stop made a huge difference. I feel like it slowed down the unlocking enough that I no longer got sprayed with powder. I don't think on most pistols that the reduced radius FPS is needed but on the pistols I have put one on there was a noticeable difference in recoil impulse, in my opinion. When I first put it on my '47 I took it to the range with my '44 Remington Rand and shot them side by side. Very different feel. If you decide you want to try the Harrison stop let me know. You like tinkering? Wait until you start buying sear jigs and tools to measure you hammer hook height | |||
|
| Powered by Social Strata | Page 1 2 |
| Please Wait. Your request is being processed... |
SIGforum.com Main Page SIG Pistols Getting OCD with my 1911...or why I shouldn't be allowed to have tools.
SIG Pistols © SIGforum 2026